Hello, I know that it’s been quite a long time since my last post. A lot has happened in the last few months. In February, my little family and I moved into a townhome after living with my parents for about seven months. Our time there lasted much longer than any of us expected, but it was such a blessing! Of course there were times where things were a little crowded, but the Lord really used that time in our lives in great ways and I am very thankful 🙂
Since we’ve moved, it has been a lot of settling in, craigslisting/hobby lobbying/decorating, building furniture, and of course all the normal stuff like working and having the two littles running around! I will post pictures of the new place soon 🙂 Our life is truly blessed!
So, please forgive the absence here. I want to also share with you that the Lord is changing a lot in my heart, rearranging priorities and my focus, my time management, helping me see what (and who) is really important.
With that said, the blog is going to change a bit too! There will still be posts on sessions with clients and other photo stuff, but it will also include more of what our real life is, our family and home and what the Lord is really doing! I’m pretty excited actually, and hope that you’ll enjoy this new season with us!
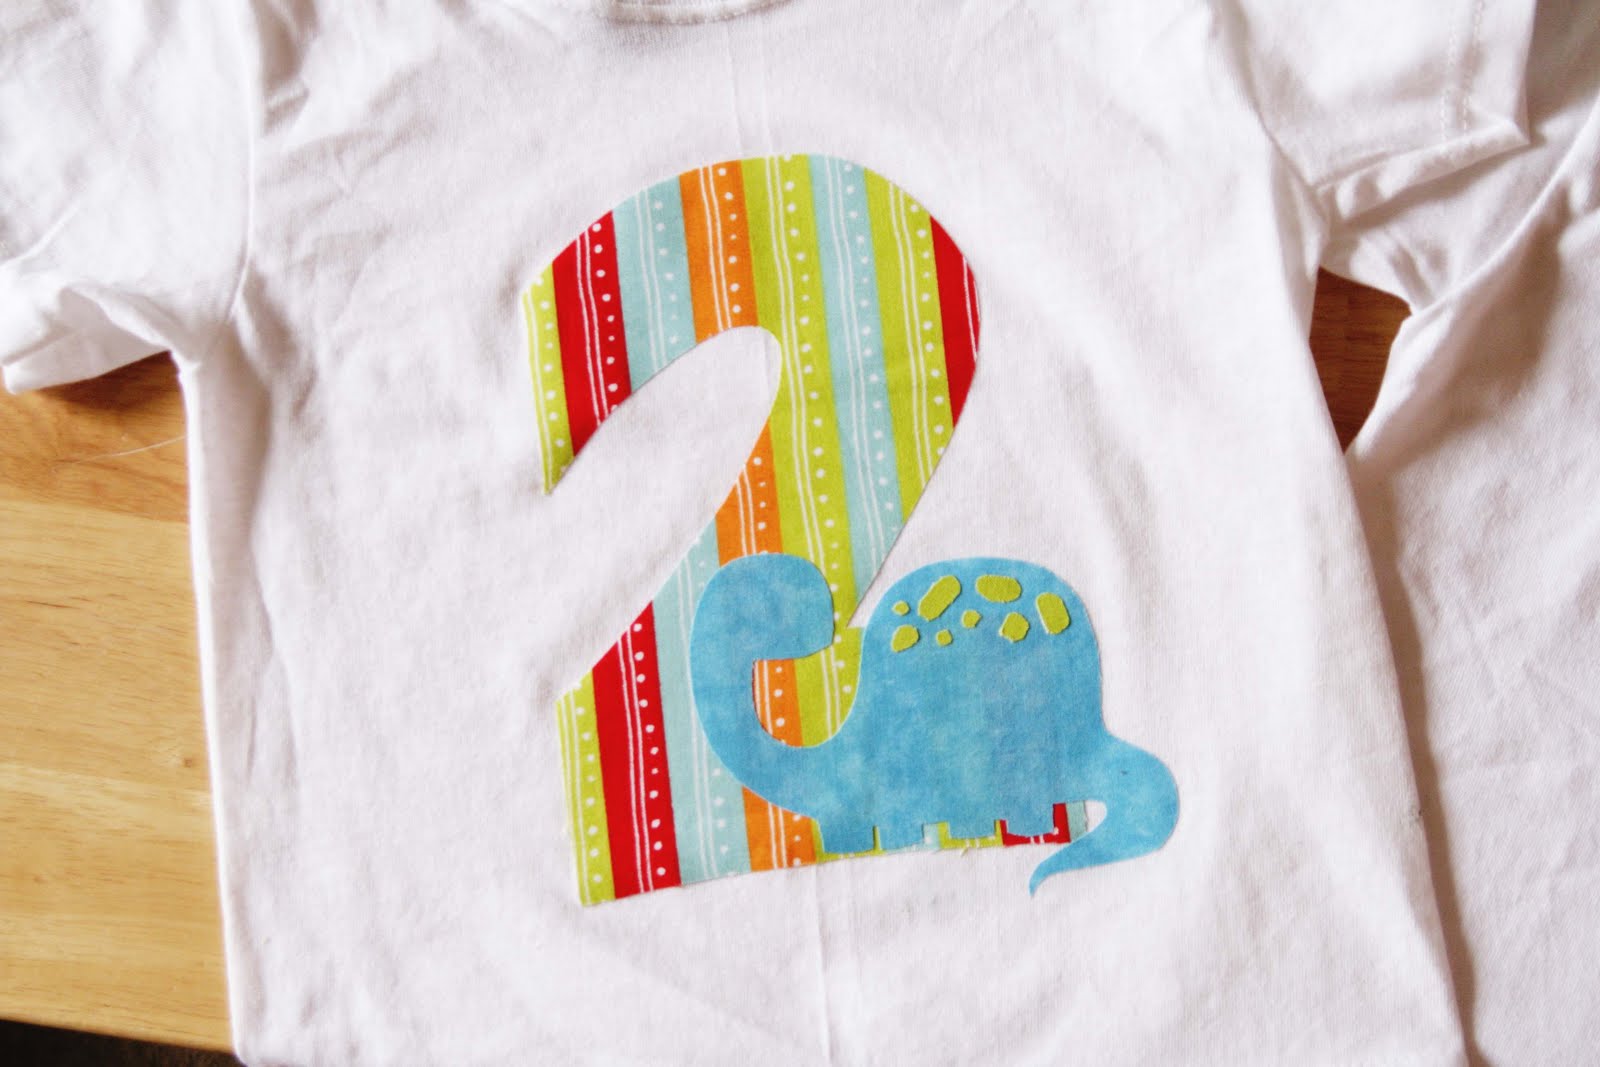
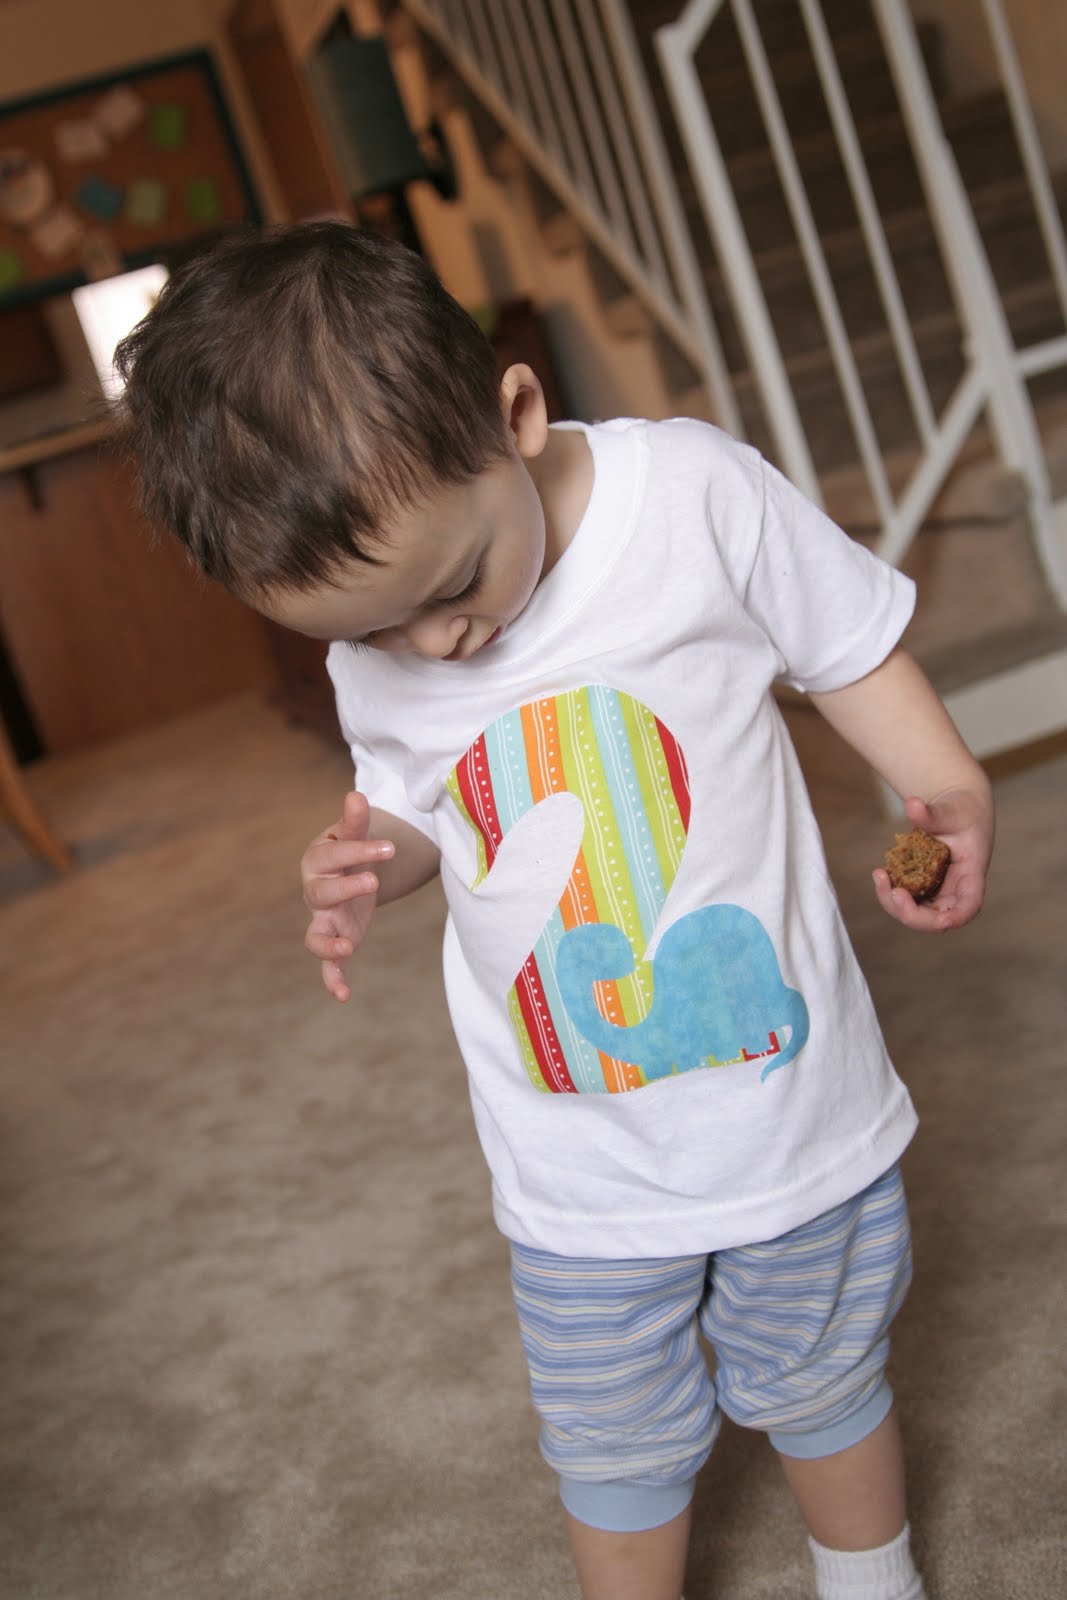
With that, I wanted to share a project I did today with you. Our baby, Ethan (not so little now 🙁 will be turning two this weekend on Easter! I decided to make him a custom t-shirt for his big day. Of course Big Brother wanted one too! So here is the first diy tutorial for the blog; hope you enjoy!!
DIY: Applique T-shits
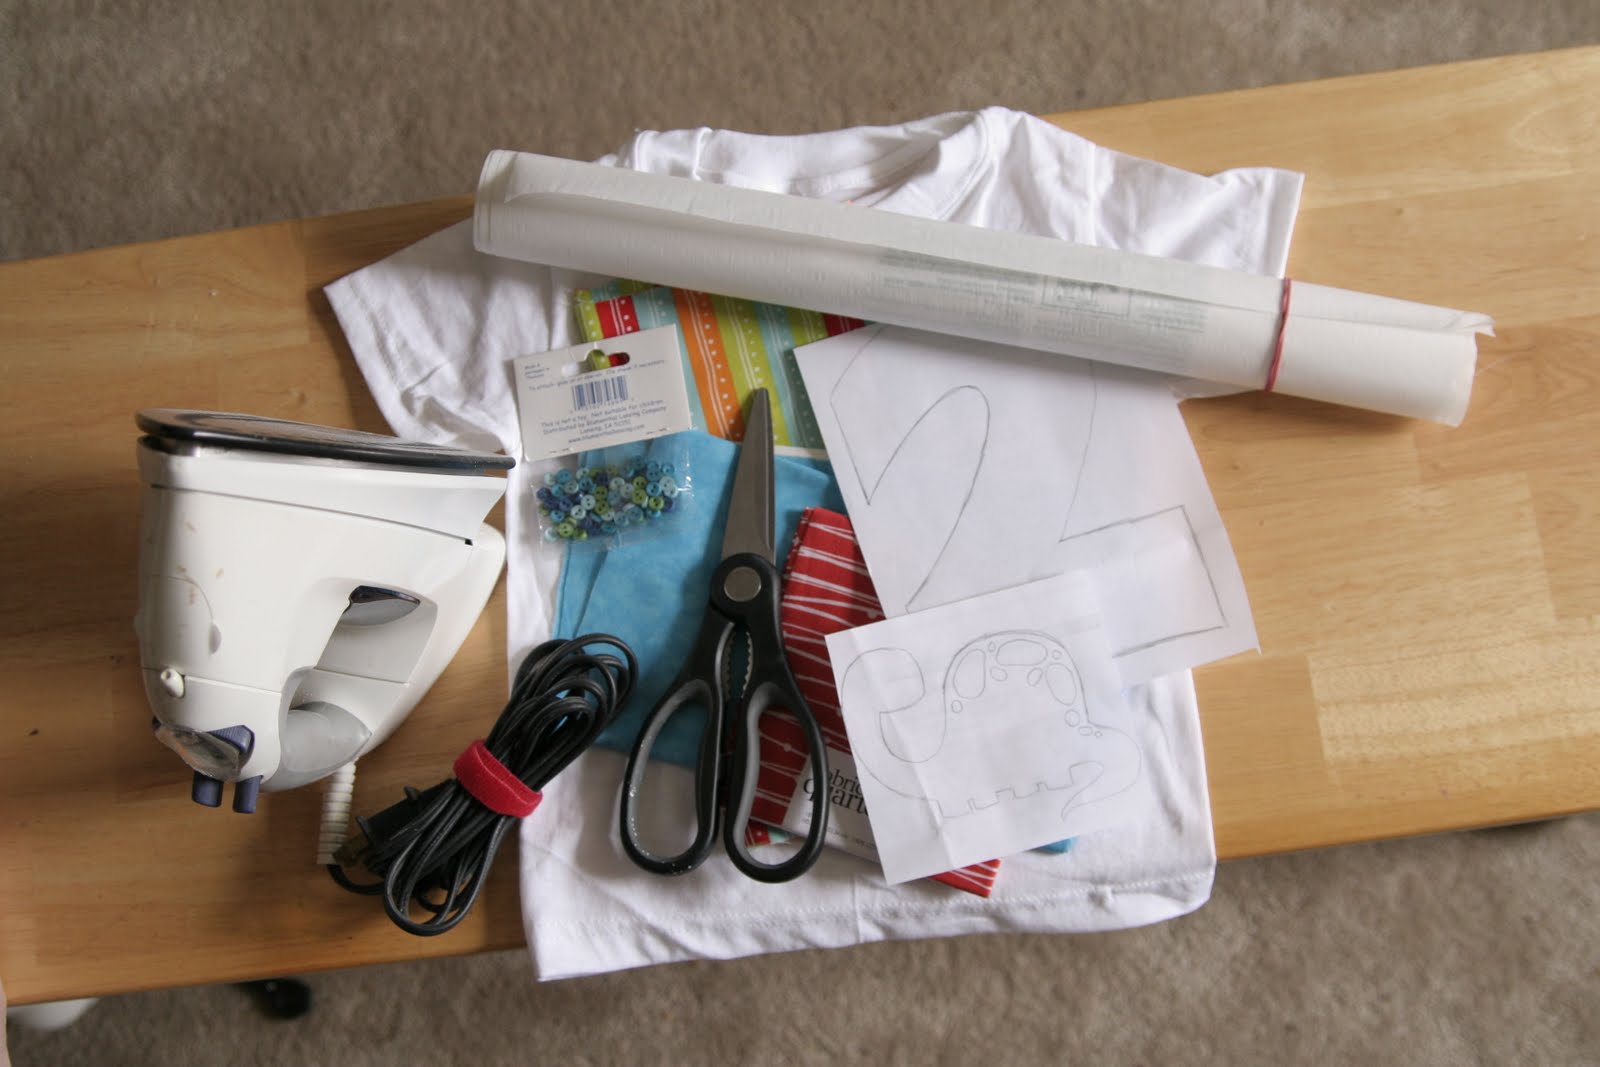
Okay, here’s what you’ll need:
– a t-shirt
– fusible web (i just asked someone at the cut counter at the fabric store 🙂
– an iron
– image(s) you’d like for the shirt (you can use clip art or draw them like I did)
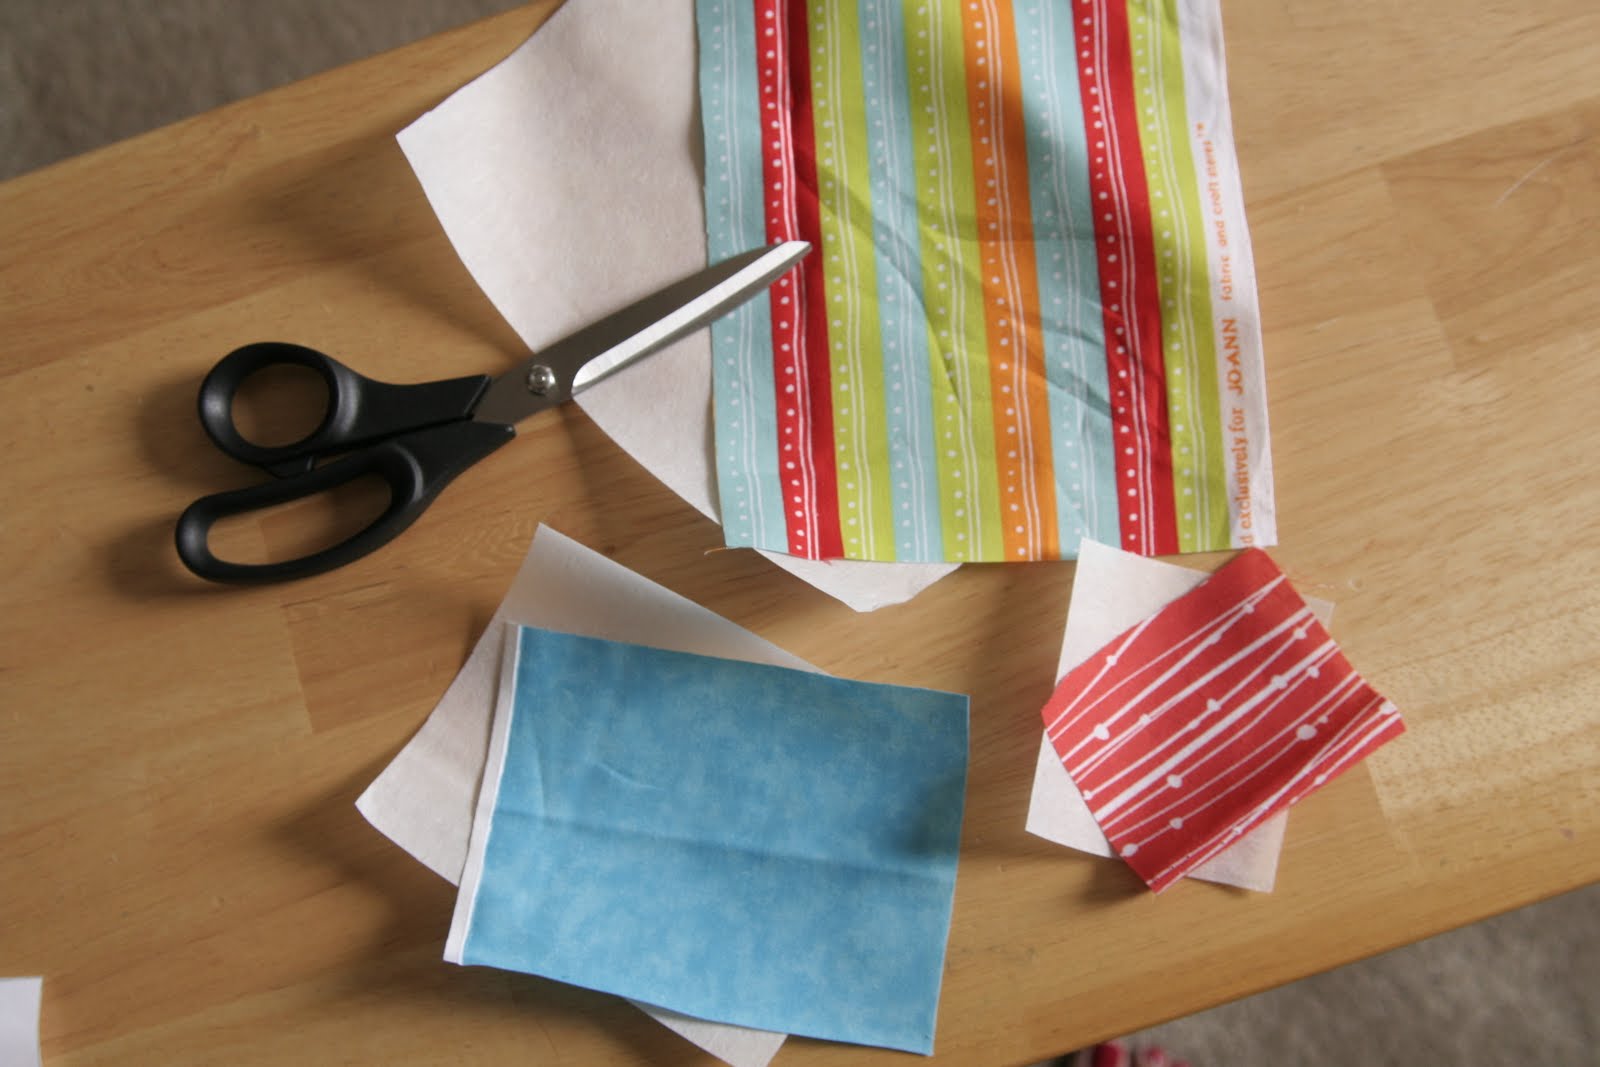
– decorative fabric(s)
– scissors
– any other embellishments (buttons, etc.)
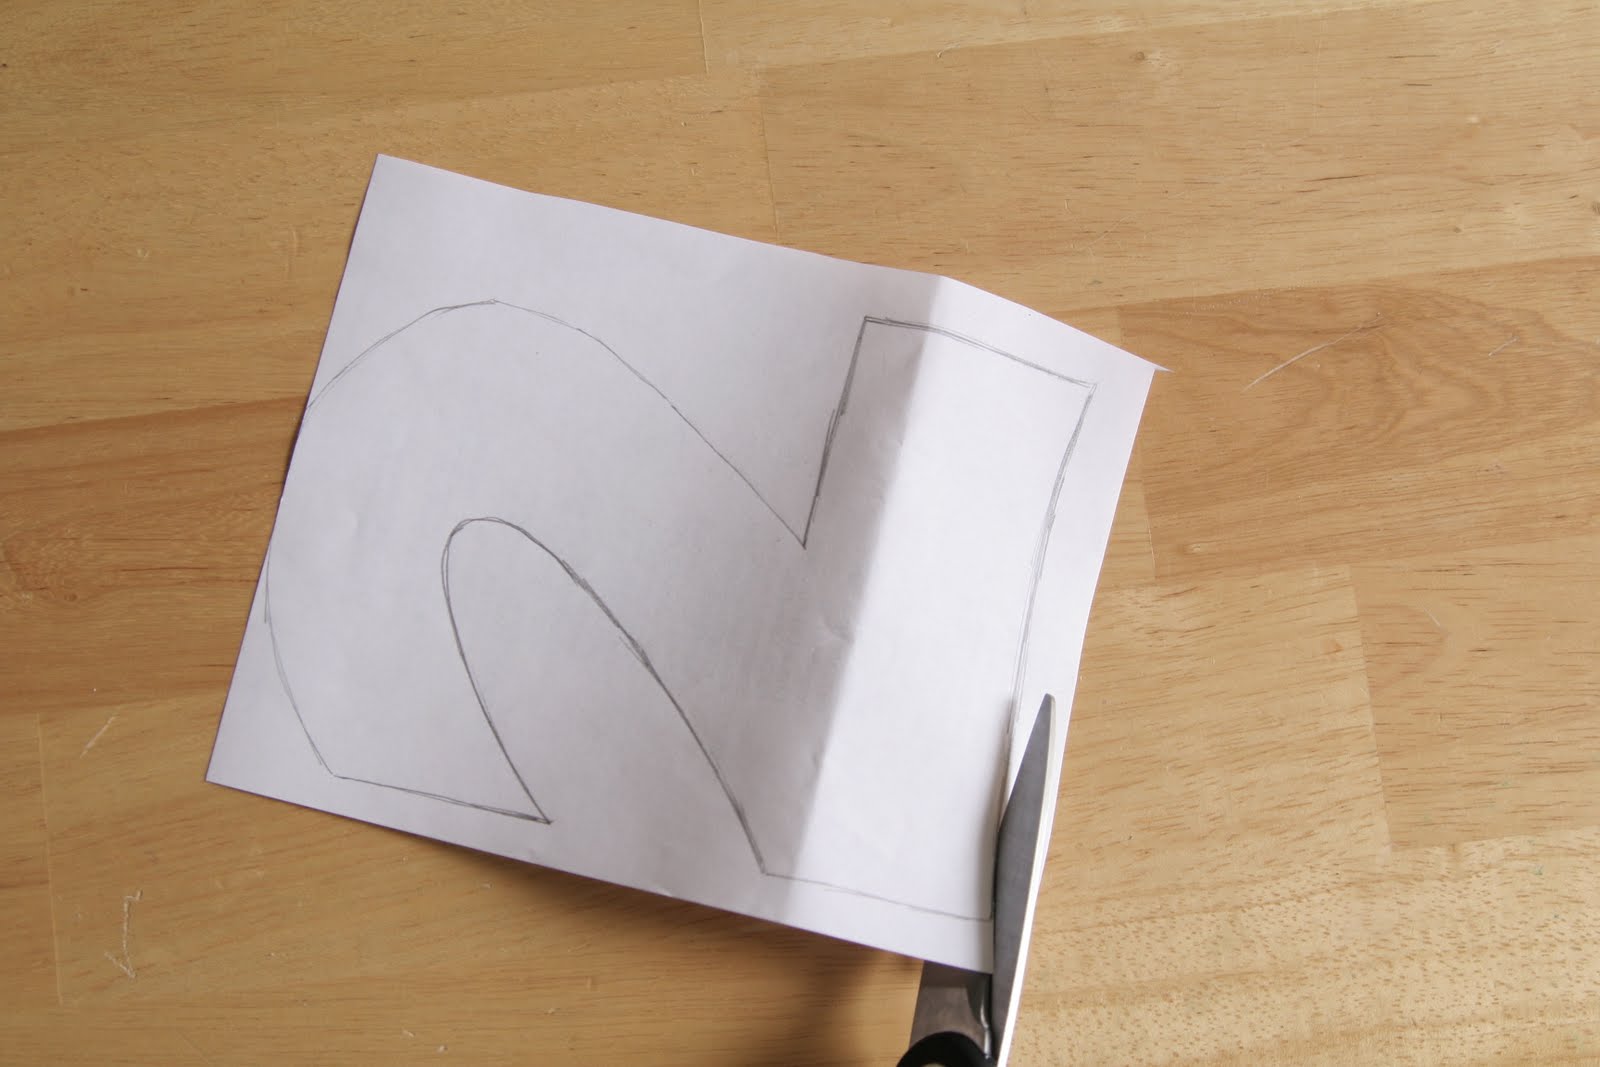
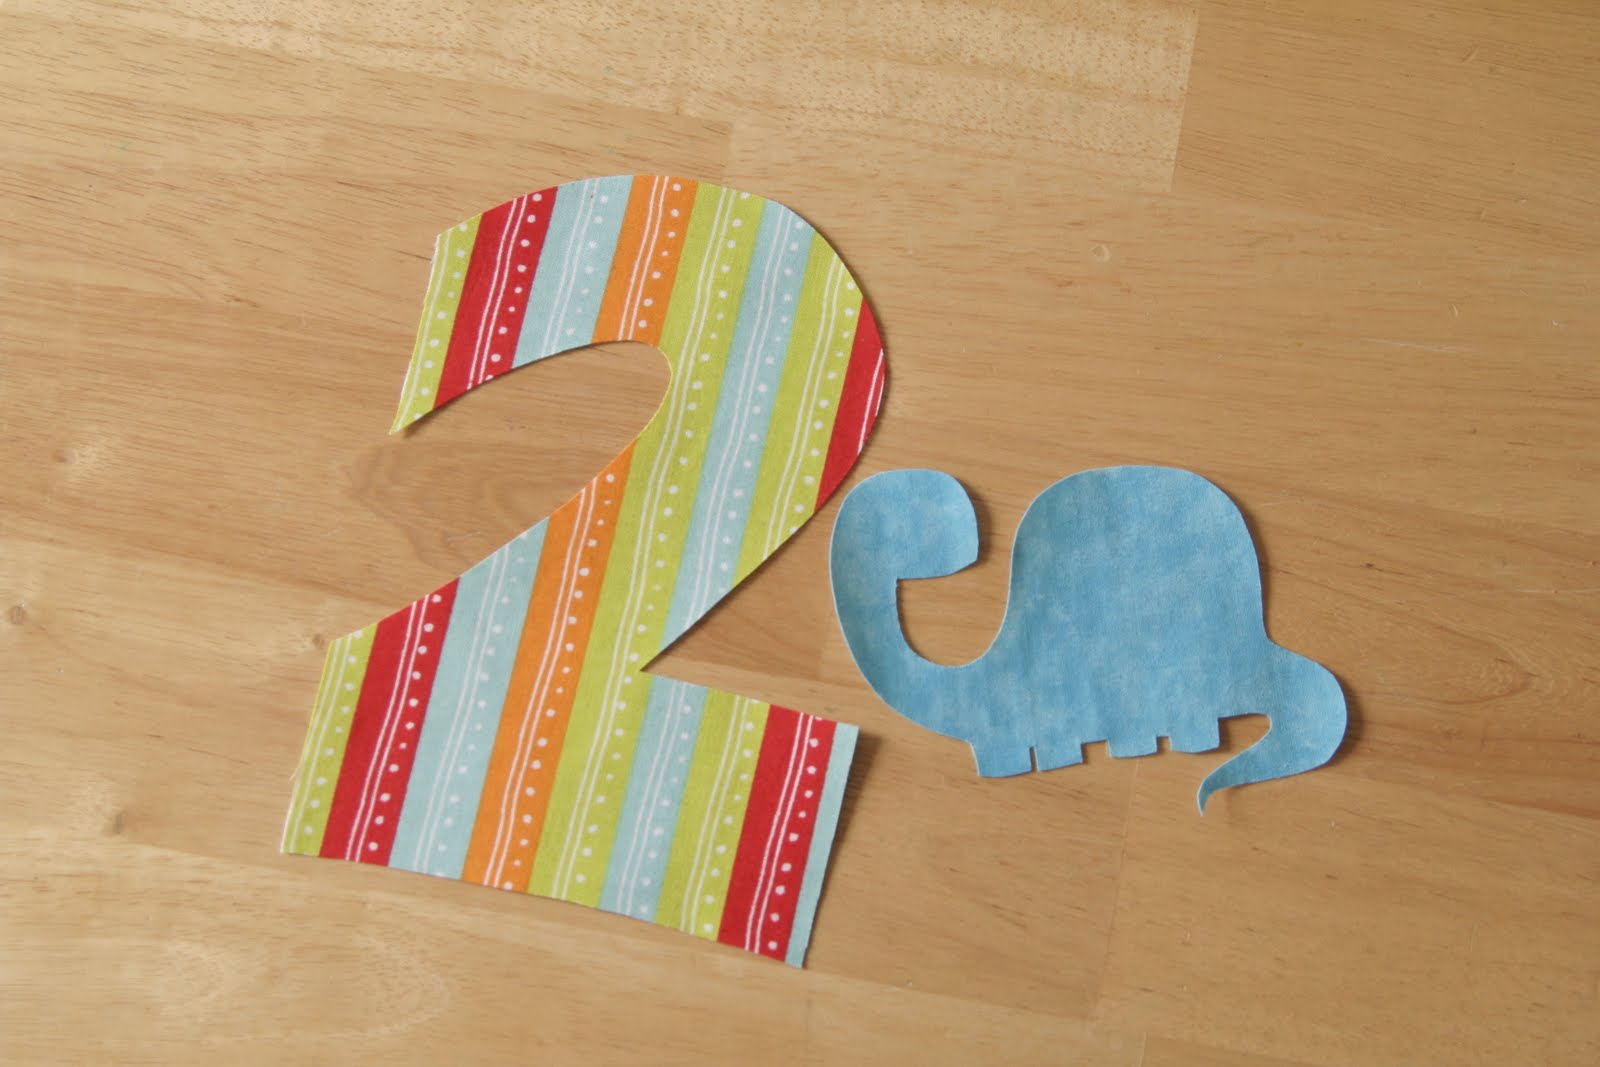
STEP ONE: Pick (or draw) your image and cut it out
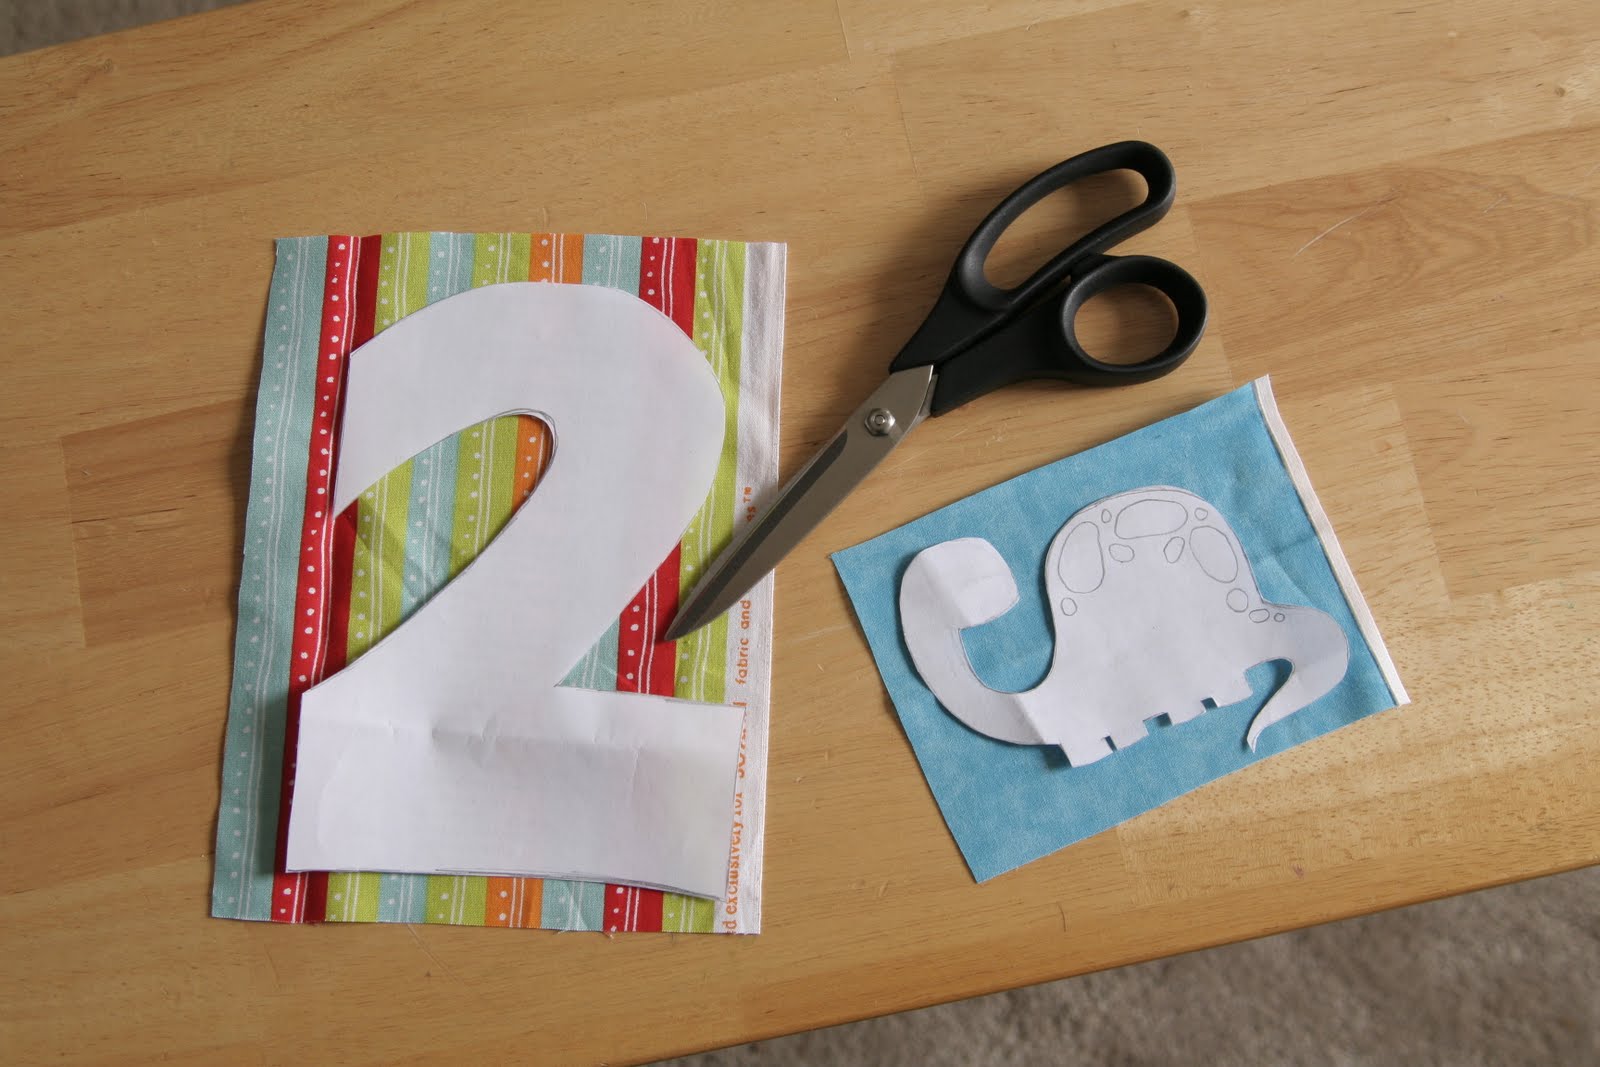
STEP TWO: Cut your fabric slightly larger than your images
STEP THREE: Cut fusible web to the size of your fabric
I did some red with stripes/dots too. Thinking about them for spots on the dino 🙂
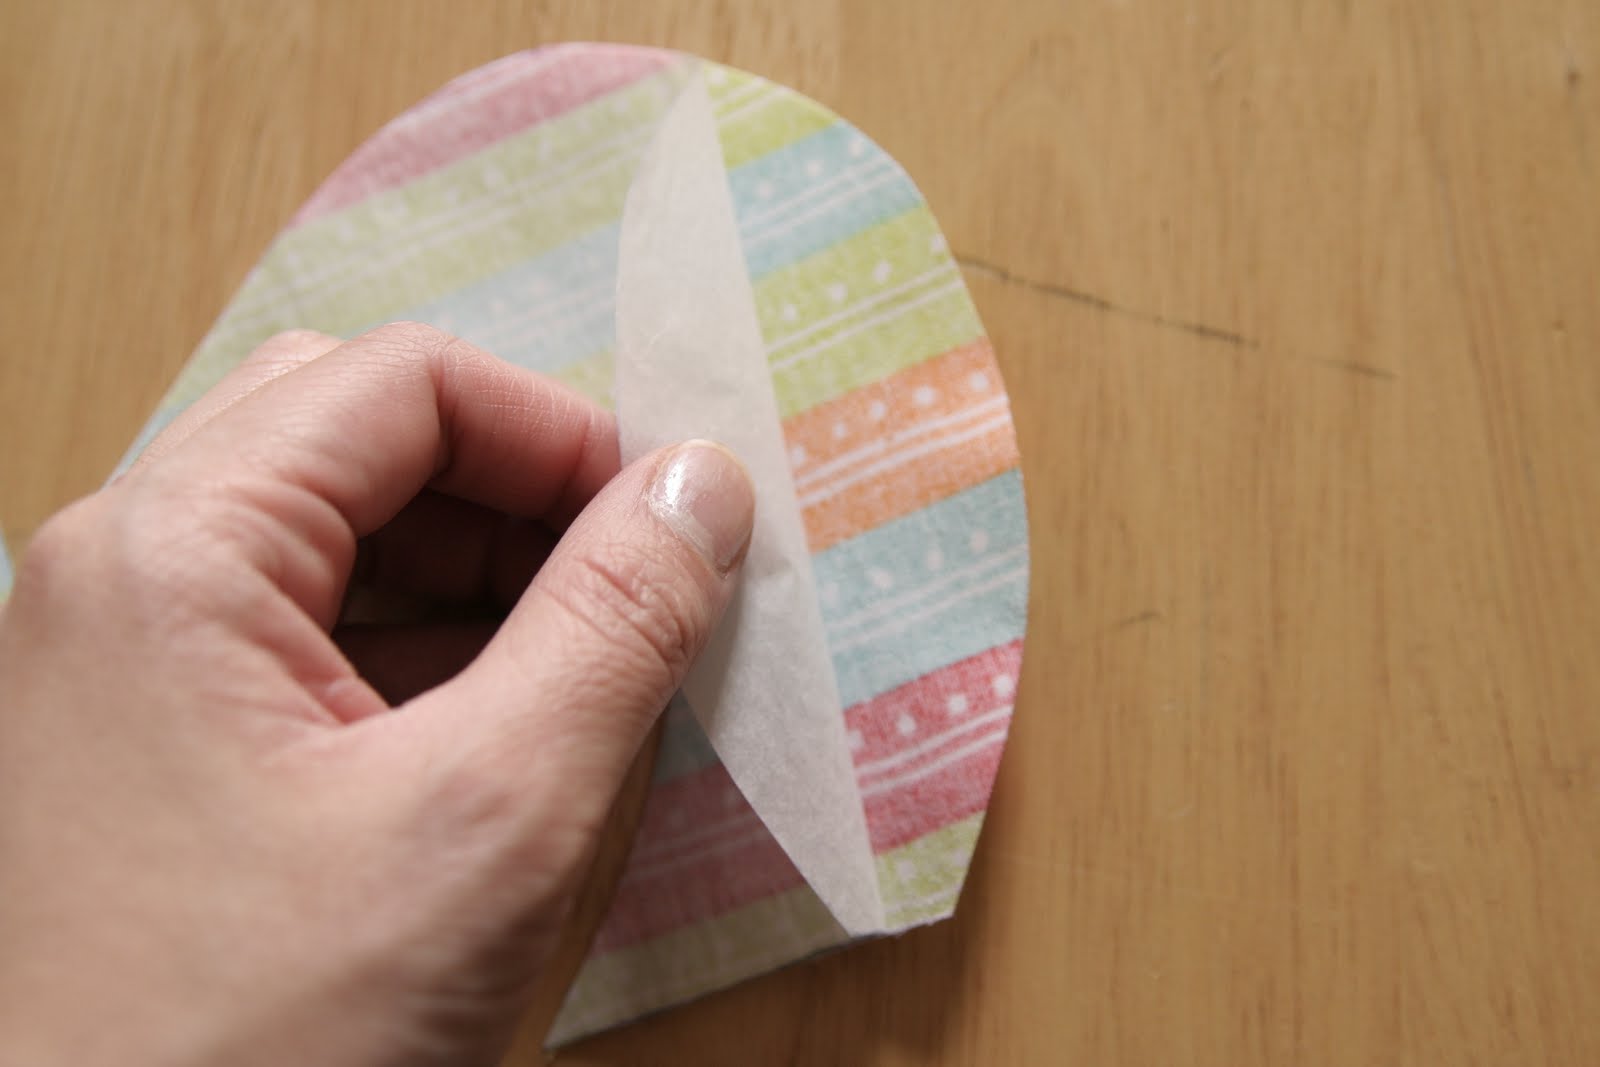
STEP FOUR: Adhere fabric to fusible web
Place fabric wrong side down against fusible web. You should be able to feel a slight texture to the correct side of the fusible web.
Cover a hard surface with cloth (a dish towel in my case) and press with
your iron (set to wool/silk with no steam)
STEP FIVE: Trace the design
Trace your image onto the paper backing of the fusible web you just adhered to the fabric. Make sure to flip your image over as you’ll be tracing a backwards version of what will appear on your shirt. (excuse the typing on the back of my images, I just used scrap paper laying around 🙂
STEP SIX: Cut out your design
STEP SEVEN: Iron onto t-shirt
Peel off the fusible web’s paper backing, decide on placement of image on the shirt, and iron on!
My shapes were overlapping, so I placed them together on the shirt
and ironed them both at the same time.
All done!!
I had him try it on when I was done 🙂
Yes, he’s holding banana bread 🙂
Here’s the design with spots on the dino, decided against the red and went with green instead
Here it is with Big Brother’s shirt. Stayed with the dino theme and Silas’ favorite color! Still need eyes for the little dino, but I’m really happy with how these came out! Hope you can use the tutorial to make some sweet stuff for your itty bitties 🙂
She’s amazing 🙂